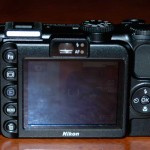
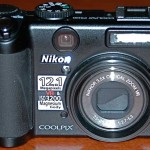
The birthday wish list of a naturalist is pretty simple: books and gear. Gear and books. Maybe some new gear and some old books? How about some new gear and some new books? While I didn’t get that shiny iPhone everyone seems to want (there’s always next year!), I got something that should turn out to be a whole lot more useful, and that doesn’t have the dreaded monthly contract: a high-resolution point-and-shoot digital camera:
This, combined with my small spotting scope, will enable me to embark on a brand new adventure: digiscoping! Basically, it’s an attempt to avoid spending $1400-$14,000 dollars for a zoom lens for the D70.
How does digiscoping work? At its core, it’s pretty simple: just hold up the camera to the telescope eyepiece, and click the “shutter” button (p&s digital cameras have electronic shutters rather than mechanical shutters, but the principle’s the same). However, as the advertising slogan for Othello has it, “a minute to learn, a lifetime to master.” There are a lot of details needed to flesh out the bare advice “point and click.”
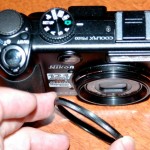
One thing you quickly discover when holding the camera to the eyepiece is that any shaking in your hand or tripod will lead to unusable images. So a few modifications are necessary. My camera, a Nikon P5100, has a removable thread ring around the lens face, which, once removed, reveals the threads beneath:
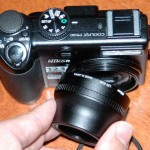
Once you have the thread cover off, you can then attach another piece of gear, the converter piece:
With this piece attached, you no longer need to worry about the zoom lens, which shoots out from the front of the camera, running into your eyepiece, potentially scratching one or both expensive piece of gear. Whew! This also allows you to, very carefully, place the converter piece into contact with the telescope eyepiece itself. The contact allows you to increase the stability, which should (in theory) lead to more usable images (see the gallery at the bottom of this post for typical results of hand-held digiscoping).
Once you have all that taken care of, you just focus the scope, hold the camera’s business end up to the telescope eyepiece, and make sure the subject is centered using the “user end” of the camera, then press play!

But to truly master the digiscope, one needs a more permanent/stable attachment between camera lens telescope ocular than handholding allows. Televue sells one for my particular needs, since I have a Televue scope and Televue eyepieces. I’ll show you how that works in the next post. (Yes, thanks for asking, the reason I won’t show it to you know is that the adapter just arrived in yesterday’s mail and I forgot to bring it to the office for my lunchtime walk through Fern Forest.)
Typical handheld digiscope shots; notice that many of them show vignetting, because the subjects are actually so close that I don’t have to zoom in all the way. And with the wide field of view, the converter (or maybe the scope’s eyepiece; I’m not sure which) cuts off the edges of the shot. If you have enough room to crop, it comes out fine, but if the subject fills the frame, it’s annoying. Note also the “blackout” effect in one of the shots of the spider. This comes from the unsteady alignment of camera lens and scope eyepiece; one of the major disadvantages of the “handheld” digipic:


Hi Ben, Very interesting explanation. We also have the Nikon P5100, and have found it more complex than we really need. But it did come in handy taking shots of the moon at night. I also found, after I had recorded fireworks on the regular setting that it has a special setting for fireworks. Nothing like reading the manual.
A few questions: can I get a password of my own choosing?
Do you read these comments?